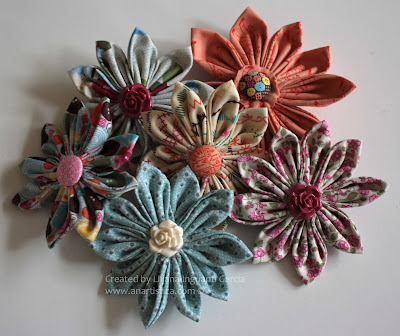
I showed these flowers at Leadership and I received a lot of positive feedback. So, I decided to post a tutorial so you can learn how to make them. They look great and you can use them as hair pieces, clip-ons, or a card decoration (or anything you like really).
I used the Springtime Vintage and Sweet Stitches Designer Fabrics (121817 and 121818 respectively), the Vintage Flowers Adornments (121879), Fabric Designer Brads (121880) and the Scallop Circle #2 Bigz Die (133469).
To make the flowers, you will also need:
-Big Shot
-Hot glue gun
-Sewing needle, neutral colored thread, thimble
-A pin or clip (optional)
1. Cut out 9 scallop circles with the Big Shot.
2. Fold the circles in half, then again in half as shown.

3. Fold the top of the quarter circle as shown.
It should look like this.
4. Thread a sewing needle and pass it through the folded top of your quarter circle. Pass it through several times to close off and secure the top. Make sure to use a thimble! After you're done, you should have your first petal!
5. Repeat step #4 on all the remaining scallop circles.
6. Once you've finished making all the petals, thread the needle once again and join all the petals. Pass the needle through the top of each petal once and arrange them in a circle. Make sure to pass the thread as close to the top as possible so you can get a tight arrangement. Once you've threaded all the petals, you can close off the flower by passing the needle through the first petal once again and making a knot.
7. Using a hot glue gun, attach the flower adornment or brad to the center of the flower as shown.
8. To seal off the back of the flower, attach a circular piece of fabric using a hot glue gun as shown. You can then attach a pin or clip if you'd like with the hot glue gun.
9. Et voilà! You're done! Your flower should now look like this. Experiment using different buttons, brads, fabrics, and different scallop diameters (so you can have small and big petals, for instance).


No comments:
Post a Comment